Setup batman-adv
B.A.T.M.A.N. advanced (batman-adv) is an implementation of the B.A.T.M.A.N. routing protocol as a Linux kernel module operating at Layer 2.
B.A.T.M.A.N. is a proactive routing protocol for wireless ad-hoc mesh networks, including Mobile Ad-Hoc Networks (MANETs). The protocol maintains information about reachable nodes (single-hop and multi-hop) and determines, for each destination, the best single-hop neighbor to forward to—without calculating full end-to-end routes—enabling efficient Layer 2 forwarding.
Important: Run the 802.11s Mesh Wizard in the Web UI before setting up batman-adv.
Setup Server Gateway
The Server (Gateway) node uplinks Internet access or bridges another non-mesh network to your 802.11s mesh. Run the 802.11s Mesh Wizard using Mesh Gate mode first.
Open LuCI at: http://10.42.0.1 (or your current management IP)
From the sidebar: Network → Interfaces
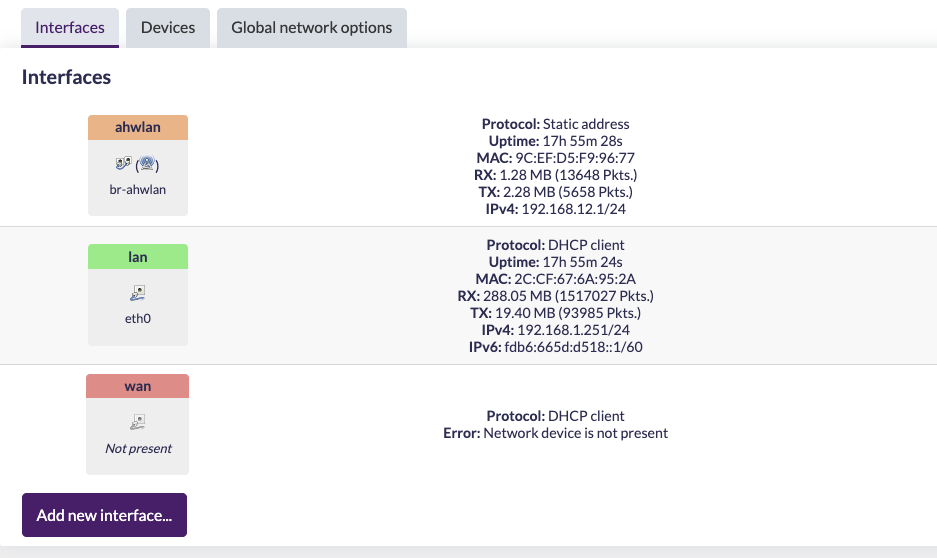
Click Add new interface…

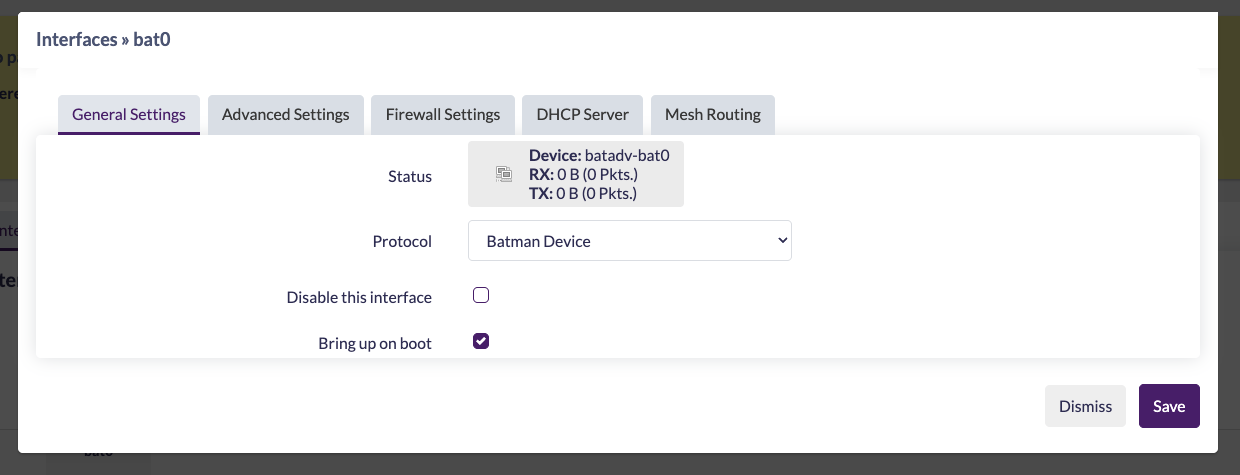
From Protocol, select Batman Device. Name it bat0 and click Create interface.
This creates the Layer 2 tunnel device bat0. Frames sent across bat0 are routed using the batman-adv protocol. You’ll be prompted for batman-specific options now (can also edit later via Edit next to bat0).
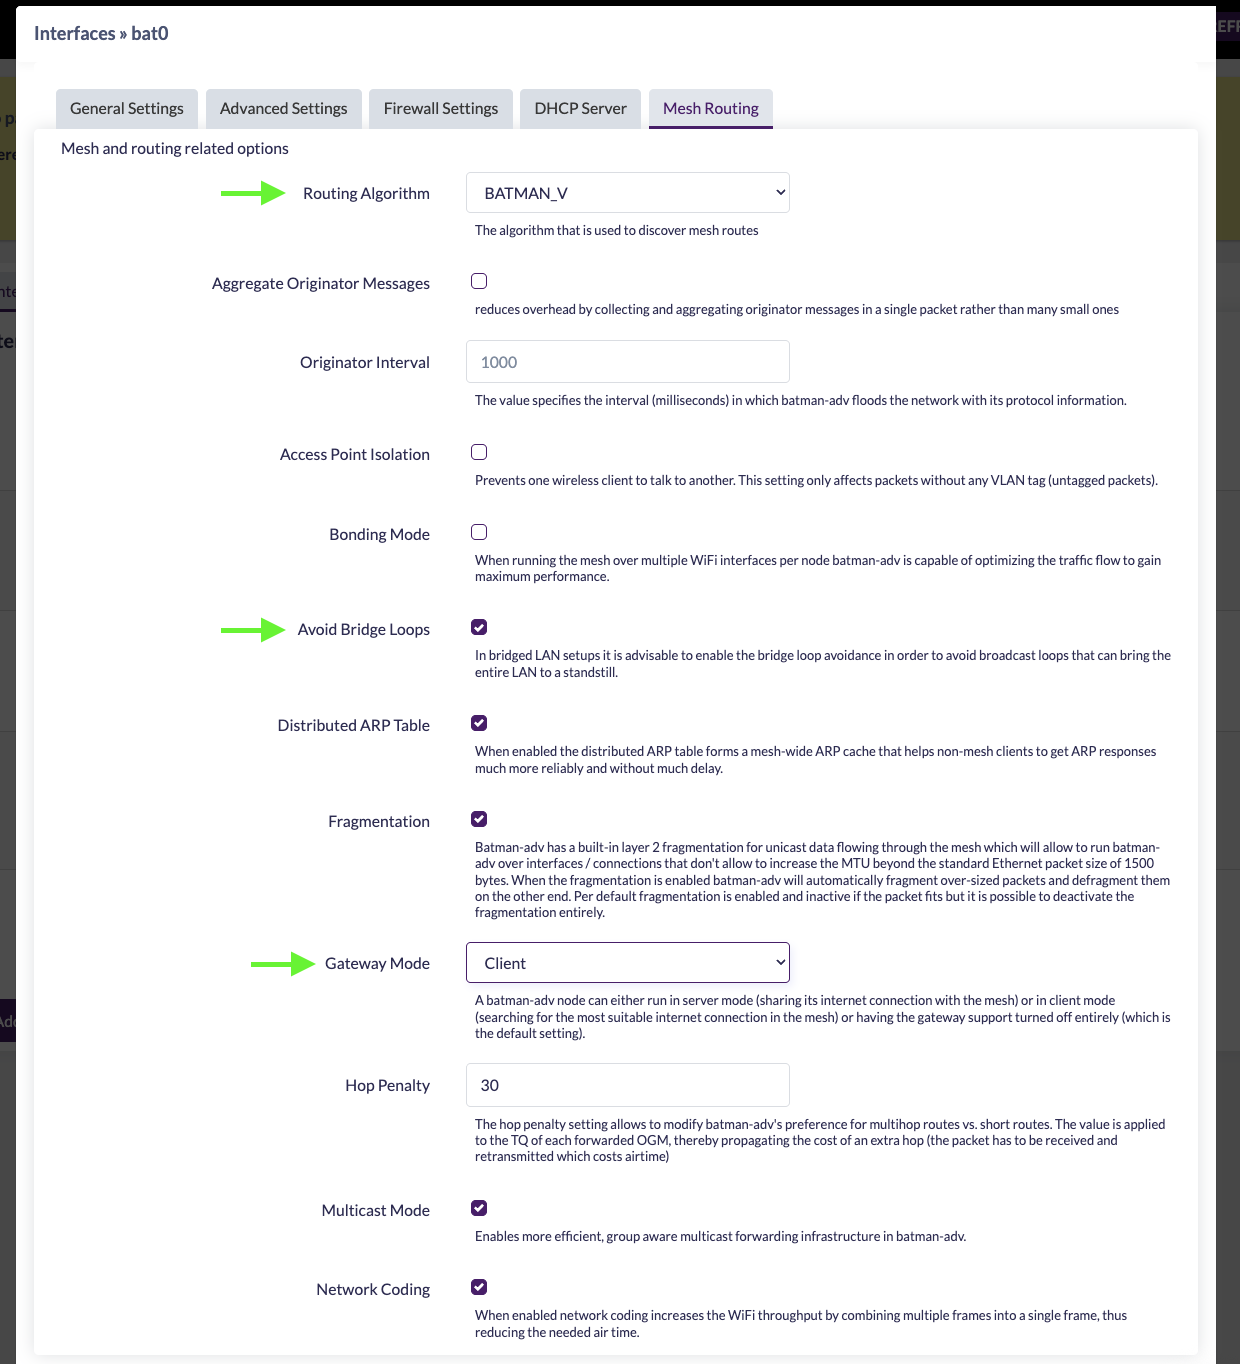
Accept most defaults, then open the Mesh Routing tab:
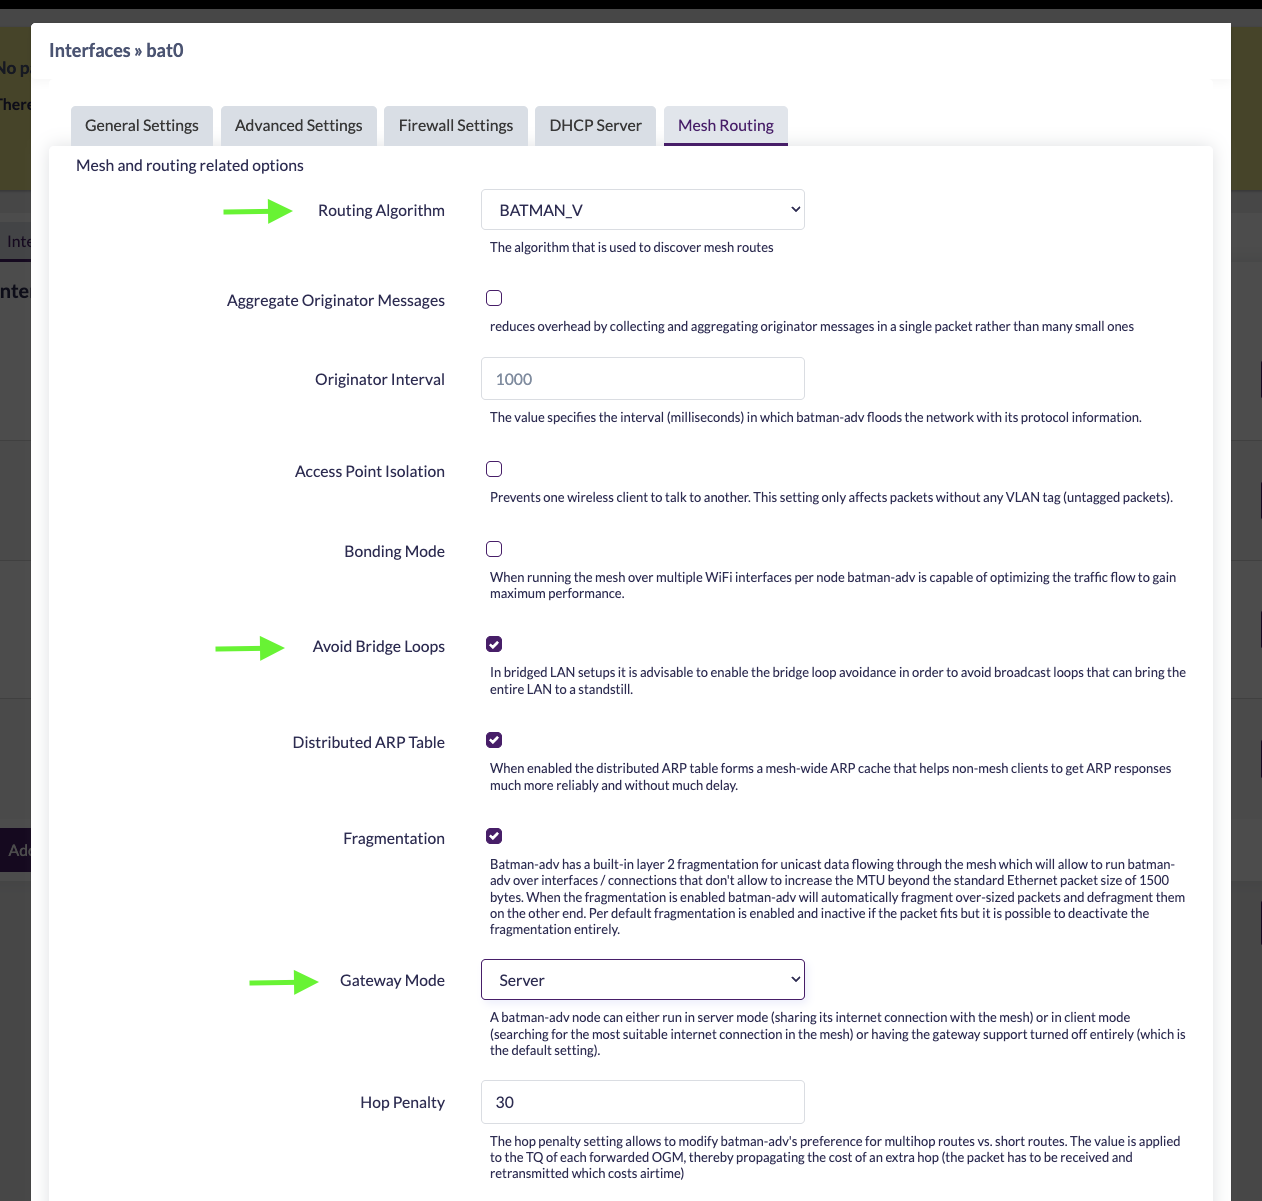
- Routing Algorithm:
BATMAN_V(all nodes must match) - Avoid Bridge Loops: ✅
- Gateway Mode:
Server(this node provides the gateway)
Save changes. bat0 is ready.
Next, create an alias interface to attach a radio to the batman mesh. Click Add new interface… again.
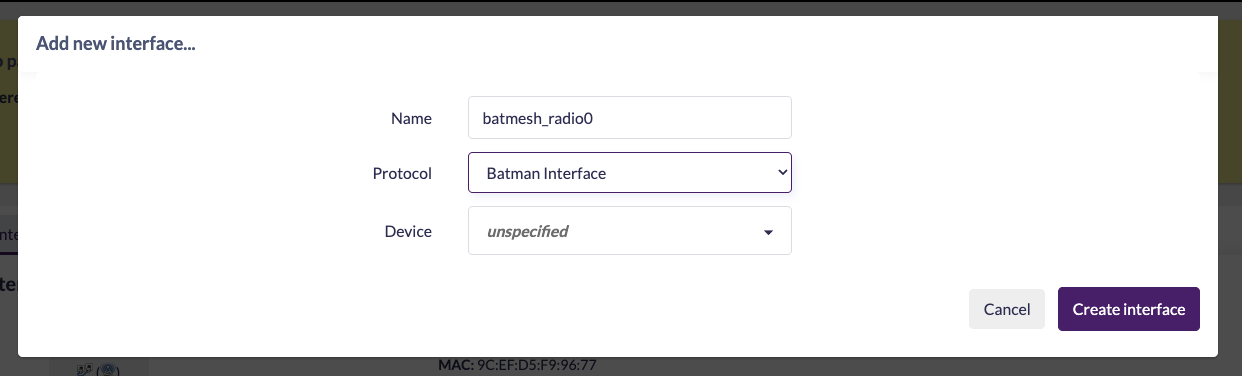
Choose Batman Interface. Name it something like batmesh_radio0.
Important: Do not select a device here; leave Device unspecified and click Create interface.
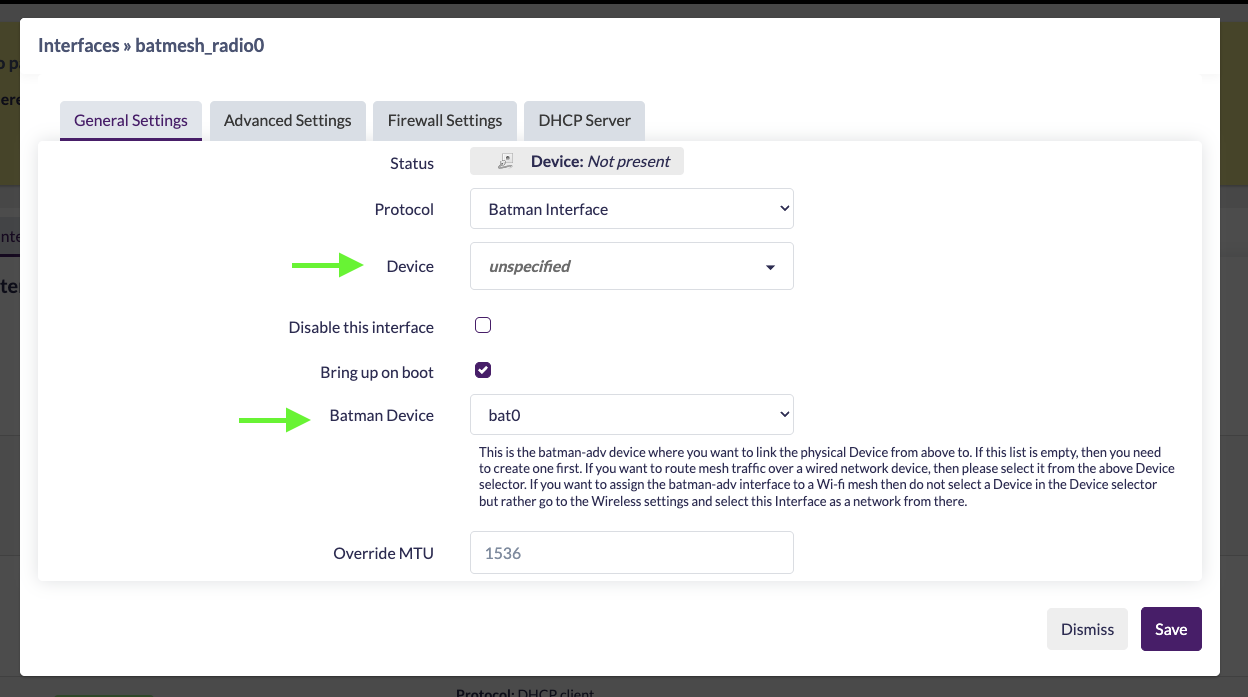
On the interface config, set Batman Device to bat0. Other defaults are usually fine.
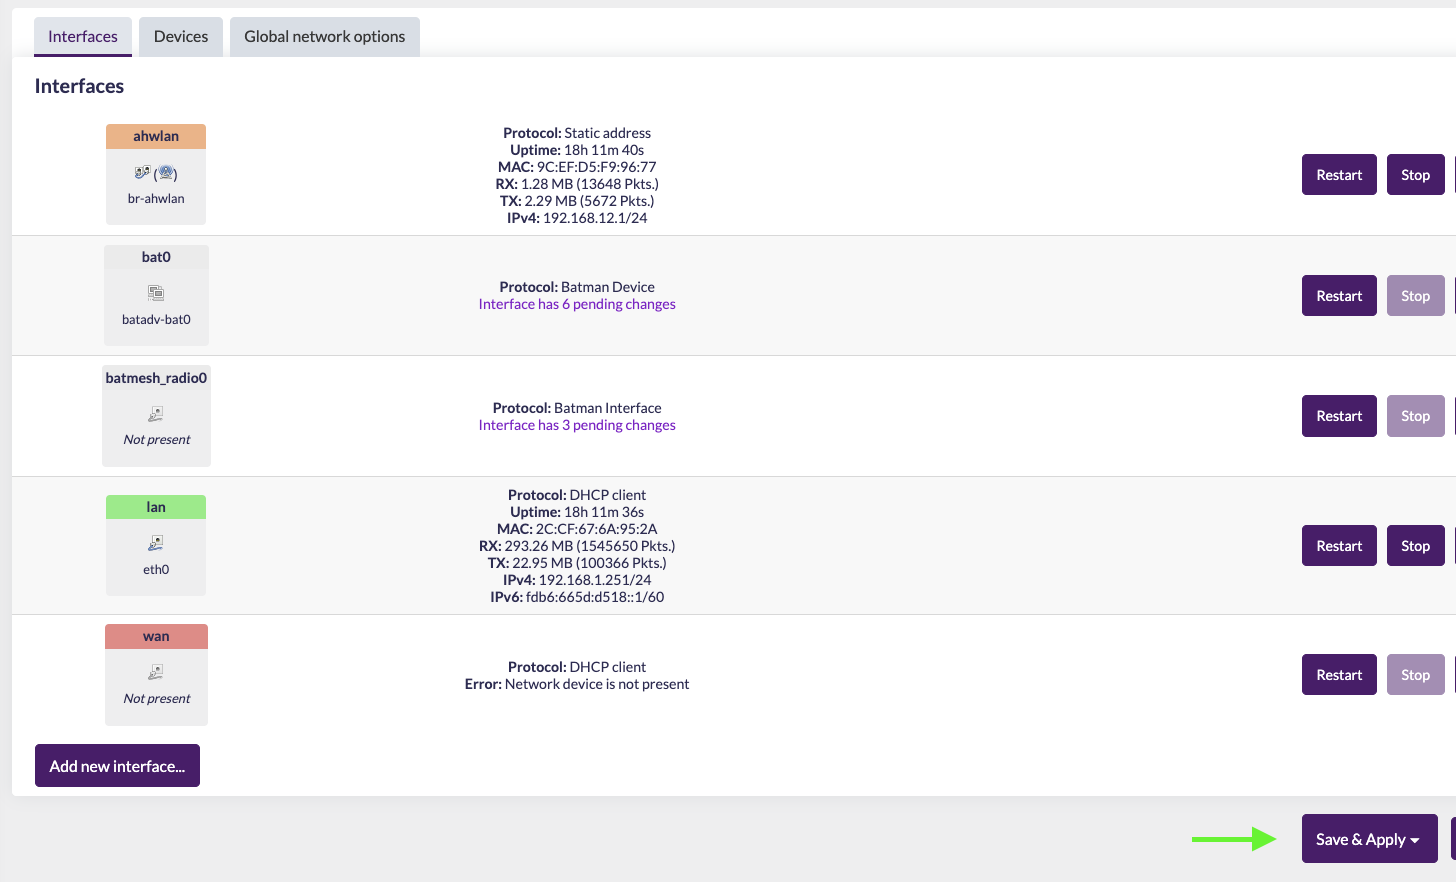
Click Save & Apply.
Bridging batman-adv to the mesh
Bridge bat0 with the HaLow mesh bridge so batman-adv handles routing across 802.11s:
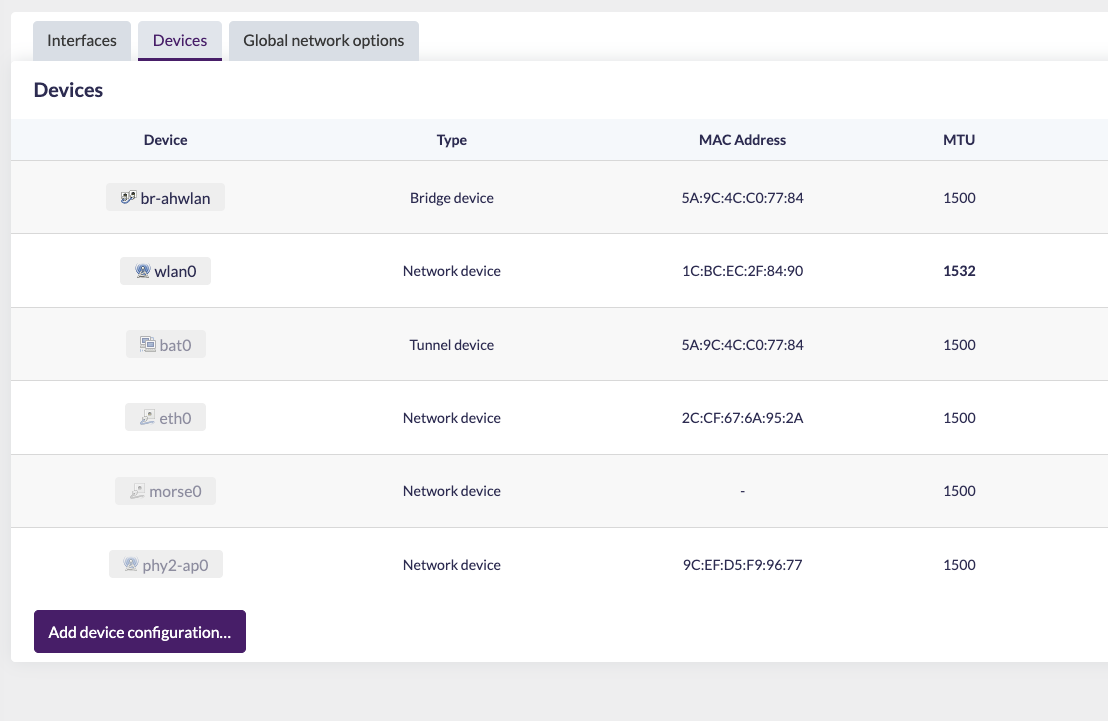
Go to Network → Interfaces → Devices.
Note: If
bat0isn’t listed, make sure you Save & Apply the previous step so the device actually exists. Then click Configure… next to thebr-ahwlanbridge.
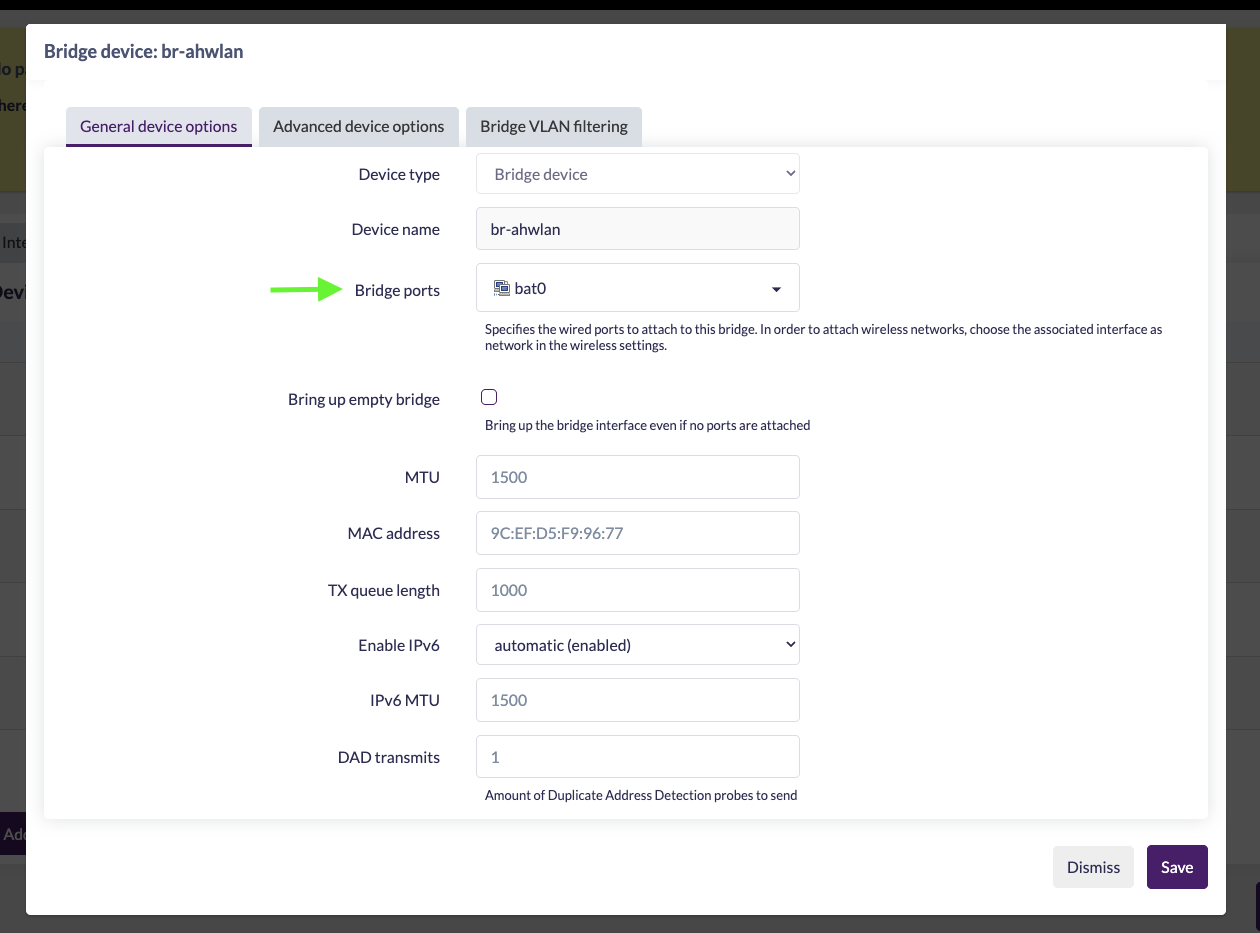
Check the devices you want bridged (e.g., bat0 and any LAN Ethernet ports), then Save.
Configuring a radio for mesh
Go to Network → Wireless.
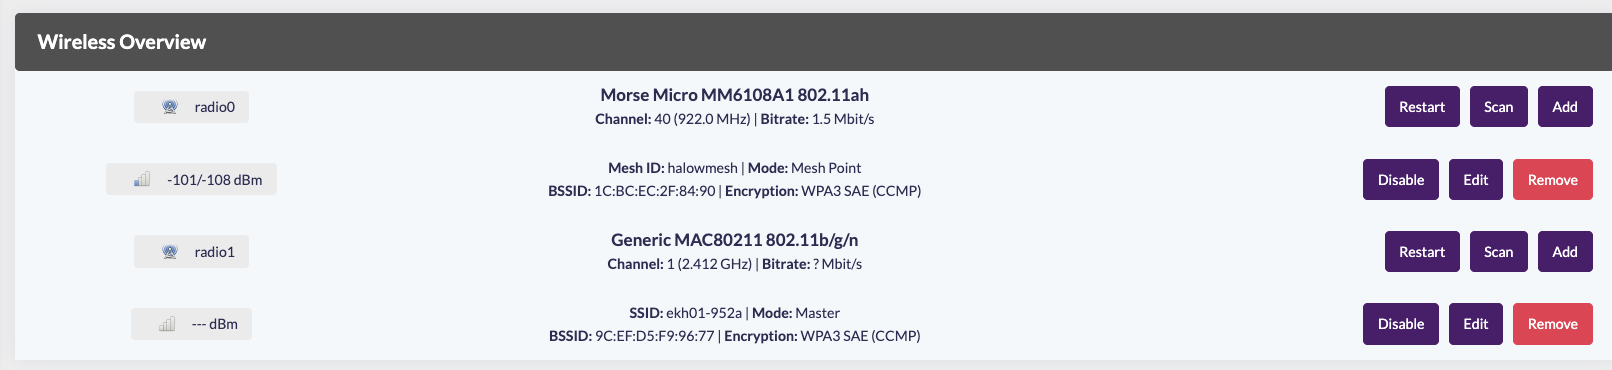
Create a New wireless network on your 802.11ah card (likely radio0).
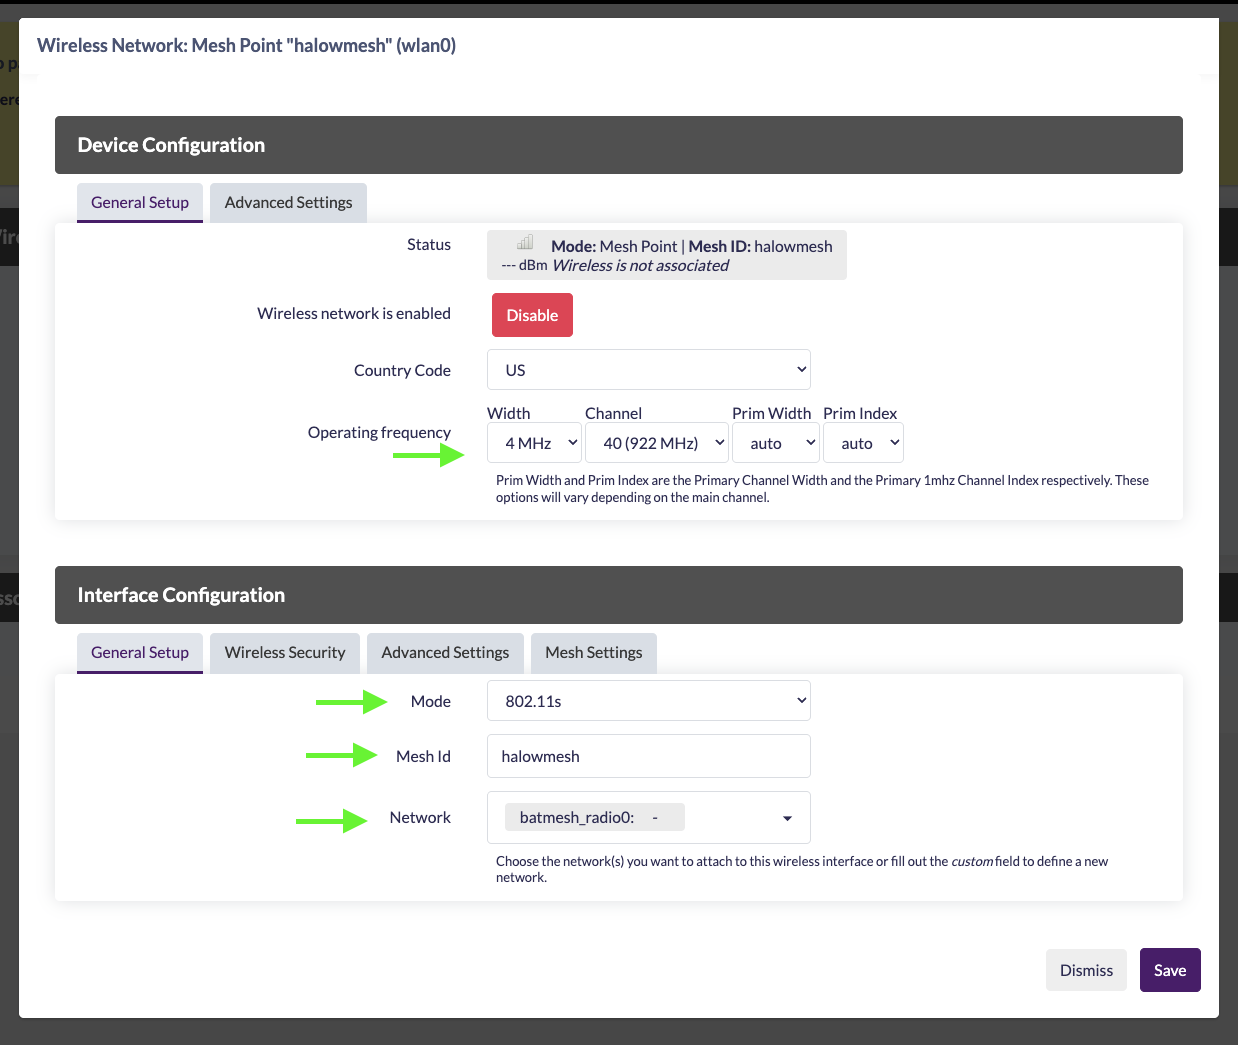
Set:
- Mode:
802.11s - Mesh ID: (choose a name; must match across all nodes)
- Network:
batmesh_radio0(or the name you used above)
Set your bandwidth and channel here.
All nodes must use the same bandwidth and channel.
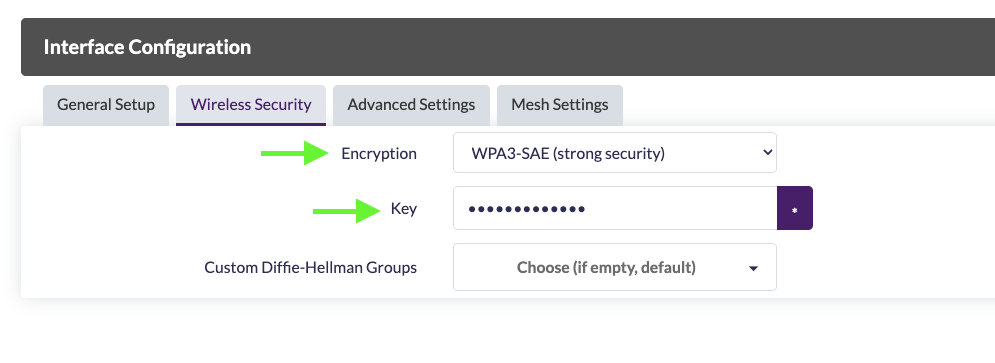
Open Wireless Security to set Encryption and Key (recommended: WPA3-SAE).
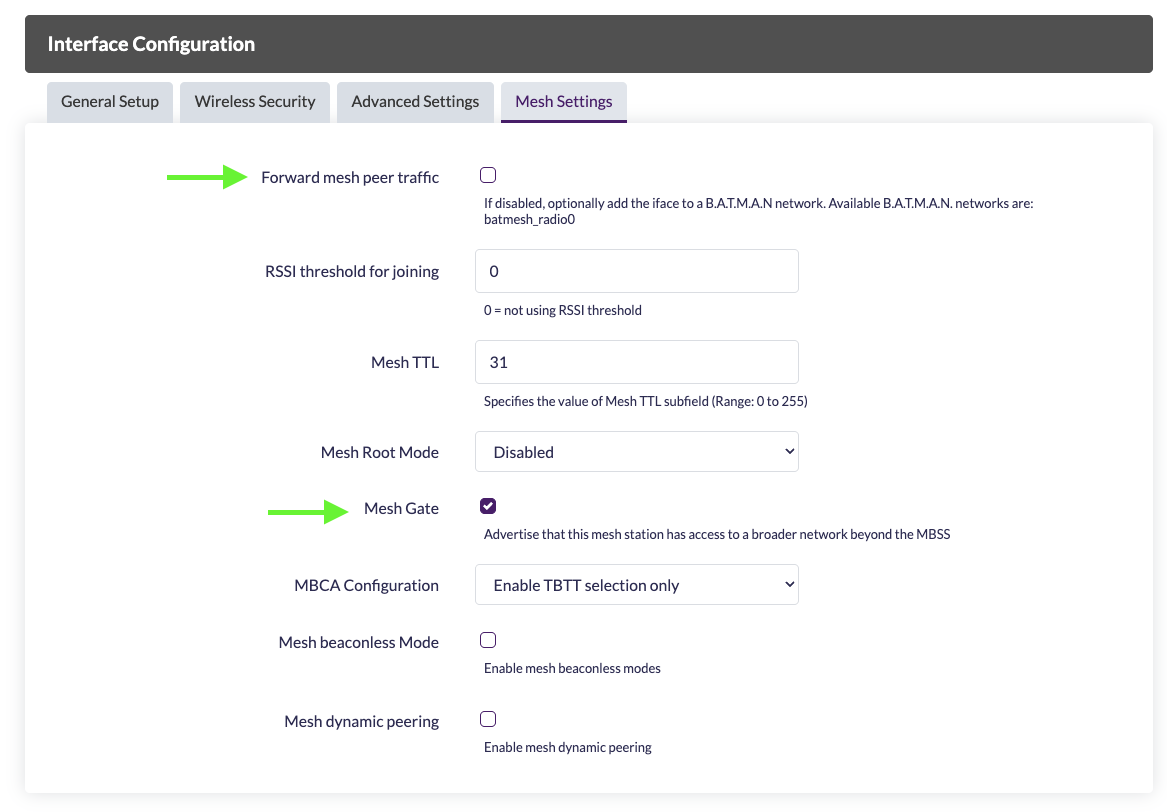
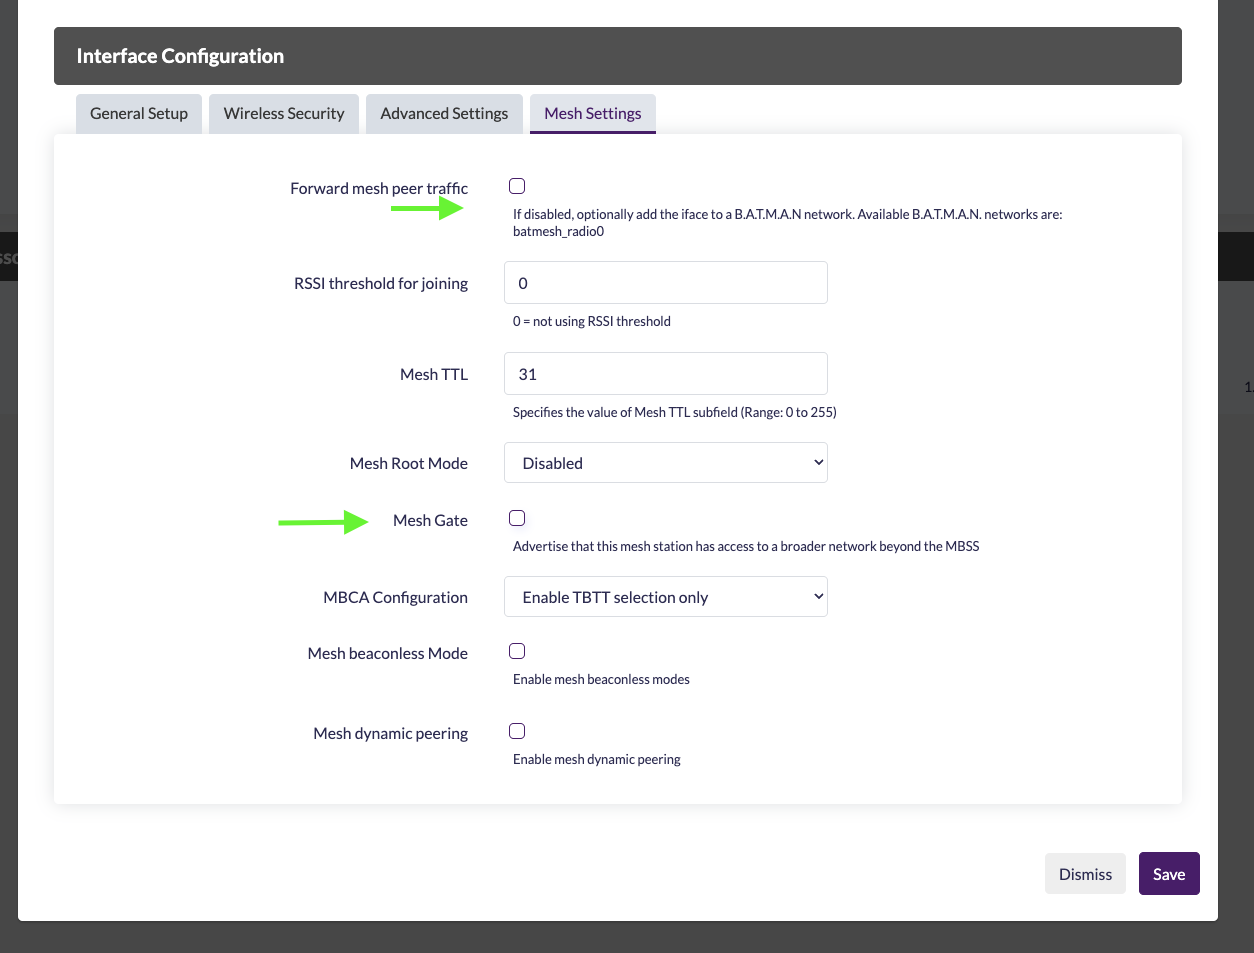
Open Mesh Settings:
- Forward mesh peer traffic: uncheck (required so batman-adv routes traffic)
- Mesh Gate: check (this node is your gateway)
Save & Apply all settings.
Setup Client Node
On the client node, run the 802.11s Mesh Wizard as a Mesh Point first.
From Network → Interfaces:
Click Add new interface…
Select Batman Device, name it bat0, and Create interface.
Open Mesh Routing:
- Routing Algorithm:
BATMAN_V(must match Server) - Avoid Bridge Loops: ✅
- Gateway Mode:
Client
Save changes. Create the alias interface:
Choose Batman Interface, name it (e.g., batmesh_radio0), leave Device unspecified, and Create Interface.
Set Batman Device to bat0 and Save & Apply.
Bridging batman-adv to the mesh (client)
Bridge bat0 with the mesh bridge:
Network → Interfaces → Devices
Configure the br-ahwlan bridge and add bat0:
Save.
Configuring the client radio
Network → Wireless
Create a New network on your 802.11ah card (radio0):
- Mode:
802.11s - Mesh ID: must match the Server/Gateway
- Network:
batmesh_radio0(or your alias name) - Bandwidth/Channel: must match all nodes
Set Wireless Security (WPA3-SAE recommended):
Open Mesh Settings:
- Forward mesh peer traffic: uncheck (let batman-adv route)
- Mesh Gate: uncheck (client node)
Save & Apply all settings.
Once both Server and Client nodes are configured (and in range), they should automatically associate and you’ll have an 802.11s mesh routed by batman-adv. 🎉